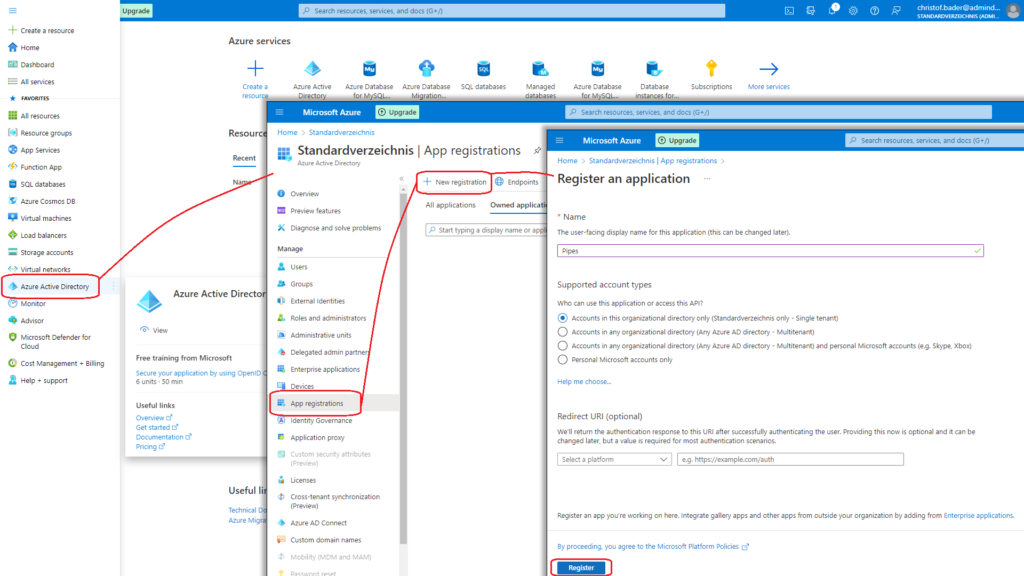
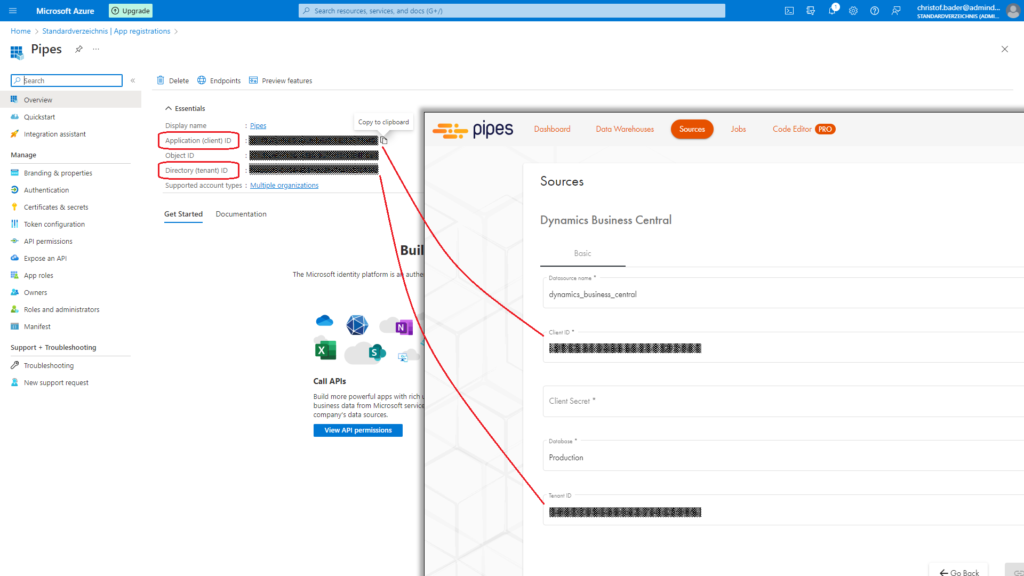
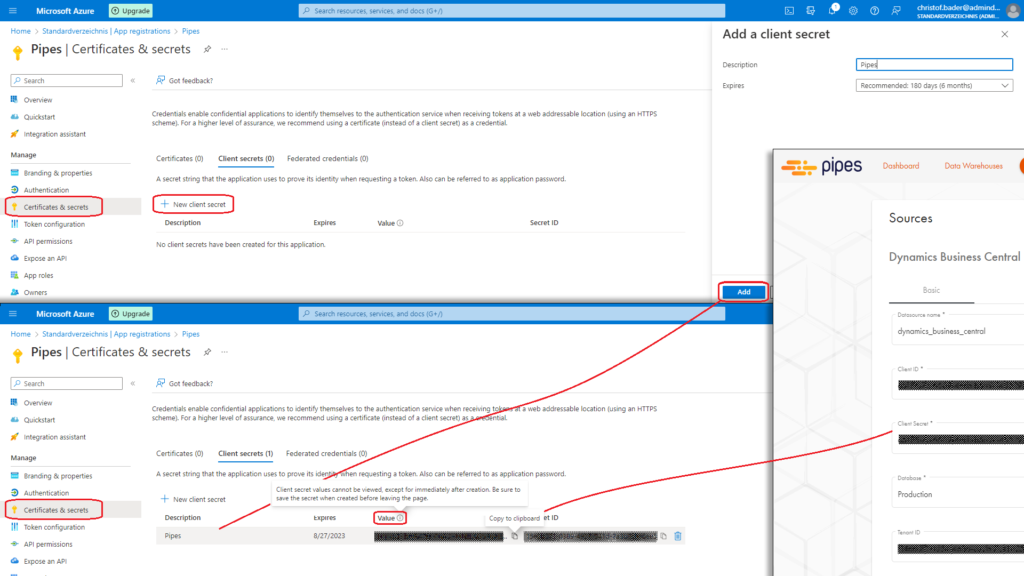
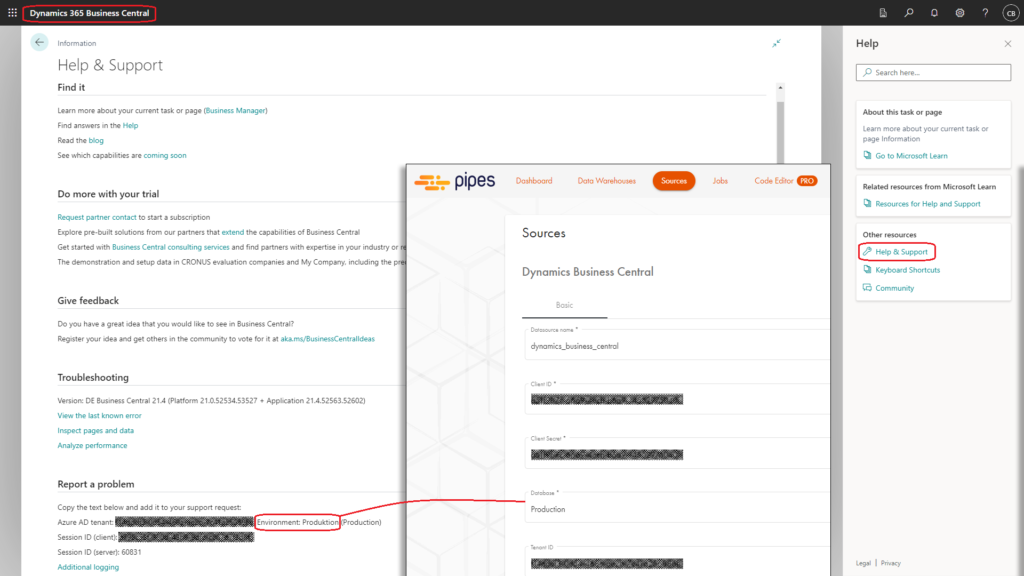
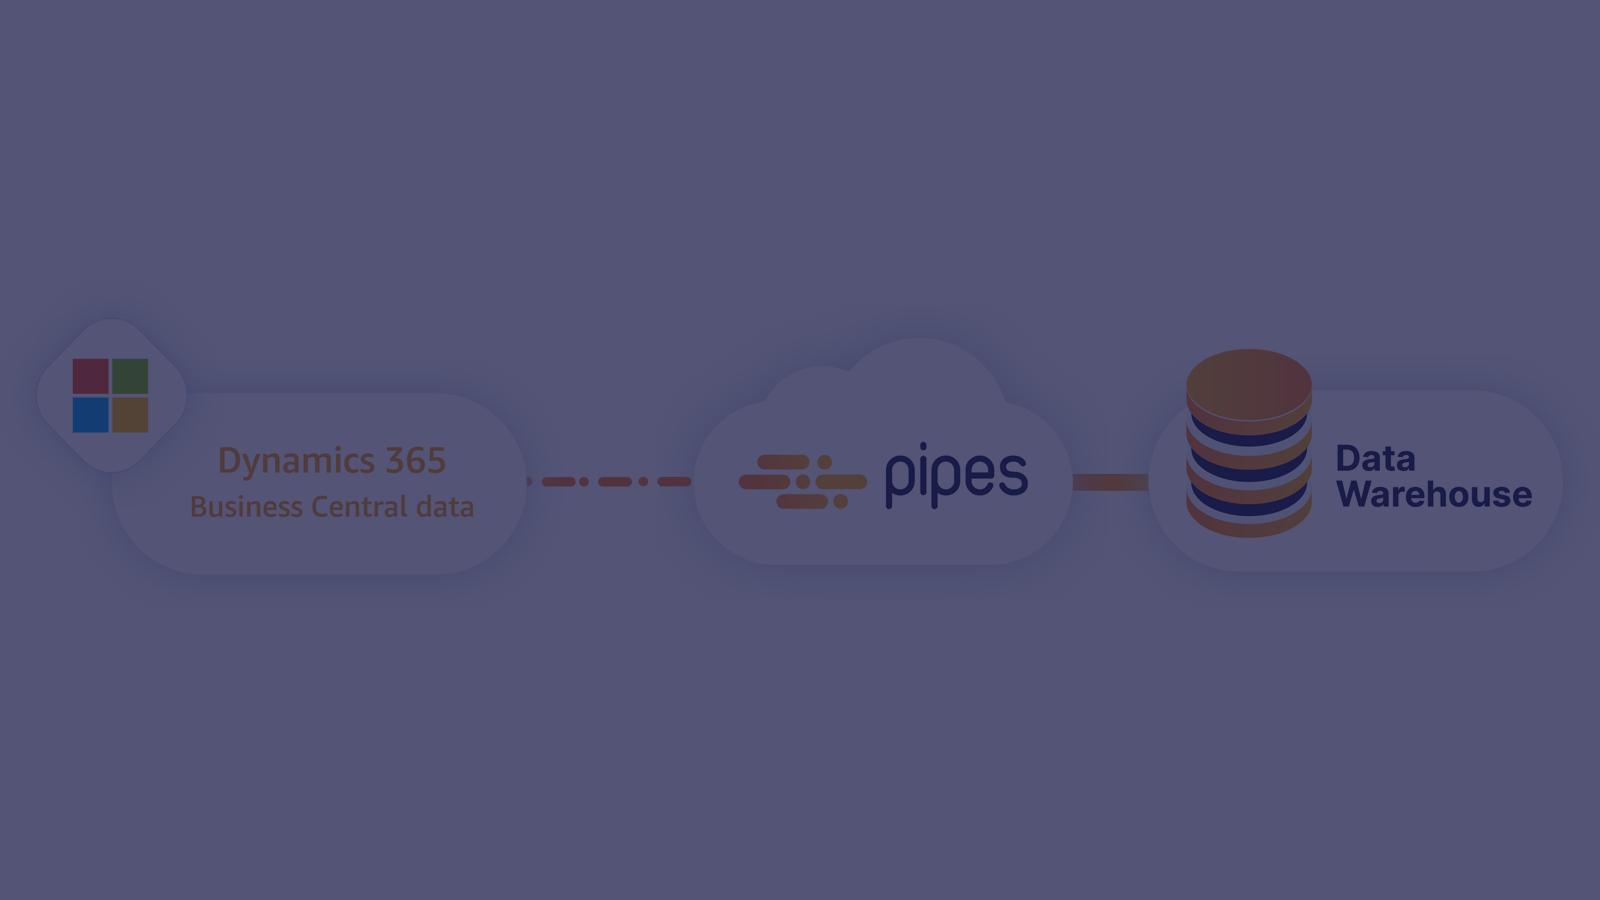
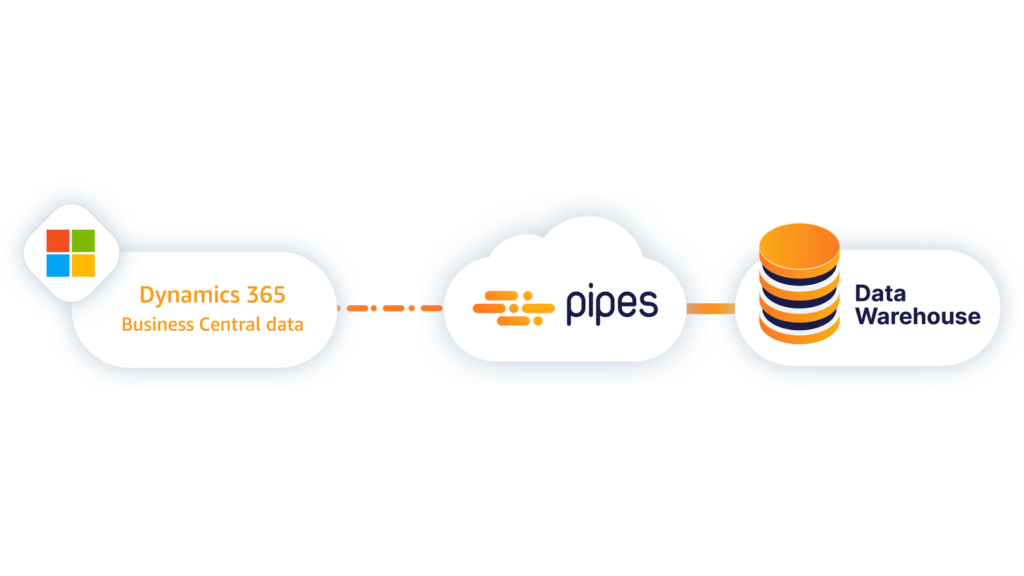
Article contents

Share Article

Microsoft Dynamics 365 API access

How to access the Microsoft Dynamics 365 API

Article contents

Many Microsoft Dynamics 365 users have been asking how to export Microsoft Dynamics 365 data since Microsoft deactivated its Data Export Service in 2022. Pipes enables access to the Microsoft Dynamics 365 API with its corresponding data connectors. Once connected, you can create data replication jobs that regularly export your Microsoft Dynamics 365 data and store it in your central data warehouse.

To grant Pipes access to the Microsoft Dynamics 365 API and connect to your CRM or Business Central apps you only need the belonging API credentials and API permissions. But where to find Microsoft Dynamics 365 API credentials? How to set the necessary API permissions and Business Central user permission sets?

This guide not only demonstrates how to export Microsoft Dynamics 365 data with Pipes. It also shows where to find the necessary Application (client) ID, Client Secret Value, the BC Environment and the Directory (tenant) ID to access Microsoft Dynamics 365 APIs. Furthermore, you will learn how to grant consent in Azure Portal and Business Central to access the Application API.

How to access the Microsoft Dynamics 365 API to set Business Central as a data source

To export Microsoft Dynamics 365 Business Central data you need to grant Pipes access to the Microsoft Dynamics 365 API and connect your Dynamics 365 application to Pipes. For this our Business Central self-connection wizard requires:

  • Client ID: Microsoft Azure Application (client) ID
  • Client Secret: Microsoft Azure App Client Secret Value 
  • Database: Microsoft Dynamics 365 Business Central Environment
  • Tenant ID: Microsoft Azure Directory (tenant) ID

How to find the Microsoft Dynamics 365 Application Client ID and Directors (tenant) ID

Navigate to the Azure Active Directory in the main menu of your Microsoft Azure Portal. Under App registrations click on New registration, name the new registration and “Register”.

Register Microsoft Dynamics 365 application

After registering a new App you will be forwarded to the App Overview where you find the Application (client) ID and the Directory (tenant) ID.

find Microsoft Azure Application ID and Tenant ID

How to find the Microsoft Client Secret Value

For generating the Microsoft Azure App Client Secret Value go to Certificates & secrets, create a new client secret and copy its Value immediately to paste it to the self-connecting wizard. The Client Secret Value is only displayed directly after the creation of the Client Secret and not again afterwards.

find Microsoft Azure App Client Secret Value

How to find the Microsoft Dynamics 365 Business Central Environment

Now it just needs to be clarified where to find the Microsoft Dynamics 365 Business Central Environment name. For this, you have to look into your Business Central dashboard and click on the (?) in the upper right corner, go to “Help & Support” and find the Environment name in the last section at the bottom of the page. Use the name directly after “Environment:” and not the name in the brackets.

find Dynamics 365 Business Central Environment

Even if you have all the necessary credentials and information don’t click on “Connect” in the self-connecting wizard until you have completed the next two steps to grant access to the API.

How to grant access to Microsoft Dynamics 365 Business Central API

Navigate in the Business Central to the Azure Active Directory Applications section by searching for “azure”. The creation of a new entry in the directory grant consent for this application to access data from Business Central. For this, you need the Application (client) ID from your Microsoft Azure Portal, fill out the Description field with an entry name and set the state of the entry to “Enabled”.

grant access to Dynamics 365 Business Central API

The Microsoft Azure Active Directory provides several User Permission Sets you can select on the newly created Application Card. For this guide, we just use the Permission Set: SUPER (DATA). Please think carefully about what permissions you would like to grant Pipes and find out what permissions are needed for which data you want to replicate.

How to grant a Microsoft Azure App registration access to the Dynamics 365 Business Central API

Finally, the already registered app must also be granted access to the Dynamics 365 Business Central API in the Microsoft Azure Portal. In the API permissions section, you can “Add a permission” for several Microsoft APIs. Among others, you can find the Dynamics 365 Business Central API.

Microsoft Azure API permissions

Request API permissions for Dynamics 365 Business Central, choose “Application permissions” and add the permissions for the registered app. For this guide, we choose just all provided permissions.

grant Business Central API permission

Now you can grant Pipes access to the Microsoft Dynamics 365 Business Central API by clicking on “Connect”.

access Microsoft Dynamics 365 Business Central API credentials

How to set Google BigQuery as the destination for all your Microsoft Dynamics 365 data

Besides Azure, Redshift, Snowflake and other cloud-based relational data warehouses Pipes also supports Google BigQuery as the central destination for all data replication jobs.

Google BigQuery data warehouse

The self-connection wizard only needs the Google BigQuery Project number and the Dataset name. You can find both in your Google BigQuery Project contained in the Dataset ID:

BigQuery Project Number

Alternatively, you can also find both in the URL of the BigQuery dataset in the parameter:

p=project_name:api-project-Project-number&d=Dataset-name

Using the Google Sign In button you grant Pipes access to your Google BigQuery dataset:

Google OAuth

How to create data replication jobs from Microsoft Dynamics 365 Business Central with Pipes

As soon as your Business Central application is connected to Pipes, you can have a look at the pre-built data templates and tables. These contain schemas of meaningful, related Business Central data, according to which Pipes create the target tables in your data warehouse.

Business Central API data

To create a data replication job click on the 3rd tile or “Jobs” in the menu. In the “Jobs” section, choose Business Central as the data source and select a data template.

Business Central data replication job

In the “PREVIEW” step, you can name the replication job and select a schedule with which Pipes shall execute the job regularly. In the window on the right, you can see again all parameters the template contains, the table structure and a preview of the table with your real Business Central data. With “Create now” you create the job and execute it so that your selected Microsoft Dynamics 365 Business Central data is exported and stored in your central data warehouse.

Business Central data pipeline configuration

After the initial data replication job has been performed, you will find your Microsoft Dynamics 365 Business Central data in the Google BigQuery dataset (after refresh) you have set as destination.

Microsoft Business Central Data in Google BigQuery

The Pipes dashboard gives you an overview of the jobs you have created and their execution status.

Pipes dashboard

How to access Microsoft Dynamics 365 API with Data Virtuality Pipes

See how easy it is to access the Microsoft Dynamics 365 API with Pipes. Three simple steps in just a couple of minutes.

1) Connect Your

Data Warehouse

2) Access Microsoft

Dynamics 365 API

3) Create Your

Replication Jobs

How to access Microsoft Dynamics 365 Business Central APIa
Play Video about How to access Microsoft Dynamics 365 Business Central APIa

Watch this demo to see how to access the Microsoft Dynamics 365 API

More interesting articles